Get started with policy tiers
Seamless network policy integration
Network policy is the primary tool for securing a Kubernetes network. It lets you restrict network traffic in your cluster so only the traffic that you want to flow is allowed. Calico Cloud provides more robust policy than Kubernetes, but you can use them together -- seamlessly. Calico Cloud supports:
- Calico Cloud network policy, (namespaced)
- Calico Cloud global network policy (non-namespaced, global)
- Kubernetes network policy
Tiers: what and why?
Tiers are a hierarchical construct used to group policies and enforce higher precedence policies that cannot be circumvented by other teams. As you will learn in this tutorial, tiers have built-in features that support workload microsegmentation.
All Calico Cloud and Kubernetes network policies reside in tiers. You can start "thinking in tiers" by grouping your teams and types of policies within each group. For example, we recommend these three tiers (platform, security, and application).
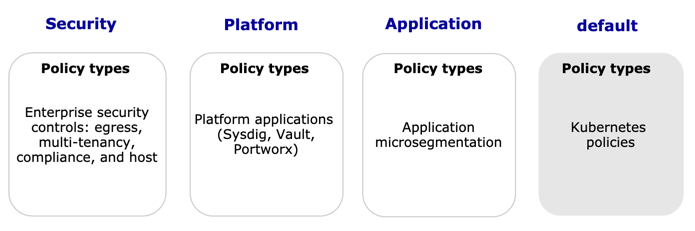
Next, you can determine the priority of policies in tiers (from top to bottom). In the following example, the platform and security tiers use Calico Cloud global network policies that apply to all pods, while developer teams can safely manage pods within namespaces using Kubernetes network policy for their applications and microservices.

Create a tier and policy
To create a tier and policy in the web console:
- In the left navbar, click Policies.
- On the Policies Board, click Add Tier.
- Name the tier, select Order, Add after
tigera-security, and save. - To create a policy in the tier, click + Add policy.
You can export all policies or a single policy to a YAML file.
Here is a sample YAML that creates a security tier and uses kubectl to apply it.
apiVersion: projectcalico.org/v3
kind: Tier
metadata:
  name: security
spec:
  order: 300
kubectl apply -f security.yaml
The default tier:
The default tier is created during installation and has the order of 1,000,000. This value is fixed, and cannot be changed. The desire is to evaluate policies in the default tier as last.
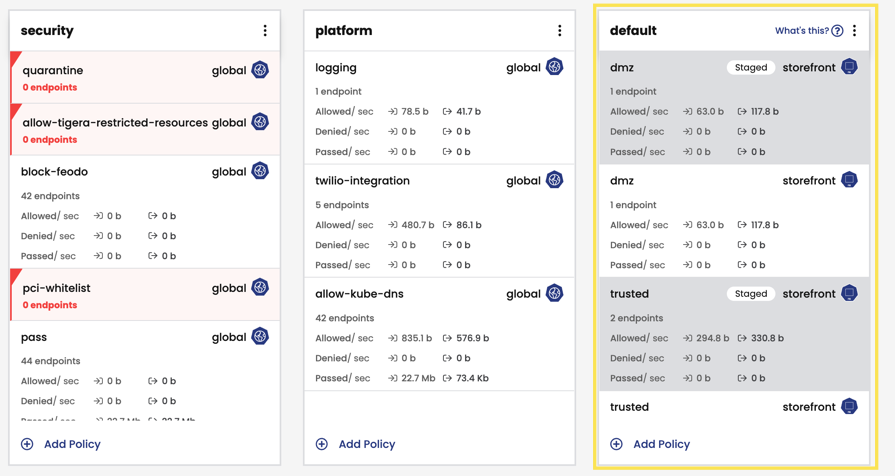
The default tier is where:
- You manage all Kubernetes network policies
- Network and global network policies are placed when you upgrade from Project Calico to Calico Cloud
- Recommended policies are placed when you use the Recommend a policy feature
The admin network policy tier:
The Tier with name adminnetworkpolicy is where all Kubernetes admin network policies reside. It is automatically created
during installation and has the order of 1,000 and a default action of Pass. This is fixed, and should not be changed.
In addition to AdminNetworkPolicy resources, you can also add Calico Cloud NetworkPolicy/GlobalNetworkPolicy resources
to the admin network policy Tier. The AdminNetworkPolicy priority field maps to the order field in the Calico Cloud
NetworkPolicy/GlobalNetworkPolicy resources so that the two types of policy can be ordered together.
The baseline admin network policy tier:
The Tier with name baselineadminnetworkpolicy is where the singleton Kubernetes baseline admin network policy resides. It is automatically created
during installation and has the order of 10,000,000 and a default action of Pass. This is fixed, and should not be changed.
In addition to the BaselineAdminNetworkPolicy resource, you can also add Calico Cloud NetworkPolicy/GlobalNetworkPolicy resources
to the baseline admin network policy Tier. The BaselineAdminNetworkPolicy is treated as if it had an order of 1,000, allowing Calico Cloud
NetworkPolicy/GlobalNetworkPolicy resources to be inserted with higher/lower precedence than the BaselineAdminNetworkPolicy.
System tiers
System tiers are added during installation and are hidden by default.
- allow-tigera tier contains policies to secure Calico Cloud components and are controlled by the Tigera Operator. These policies should not be edited, and the tier should not be moved. Inadvertent changes are automatically reverted by the Operator to ensure your cluster is always protected.
Although it is possible to change the behavior of the allow-tigera using adjacent tiers, it is not a trivial task. You can break critical cluster traffic and impact the operation of Calico Cloud. To prevent loss of cluster services, see Change allow-tigera tier behavior, and contact Support for help.
Moving tiers
You can move tiers by dragging and moving them in the graphical sequence, but all tiers must be visible first before you reorder tiers.
To show all tiers, click View and select all of the tiers in the Show tiers list.
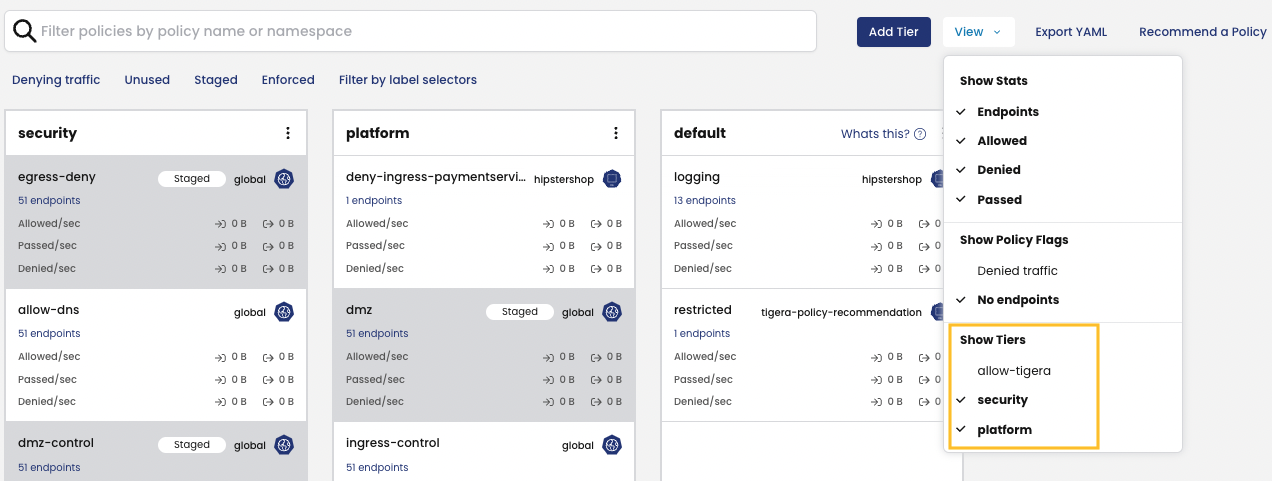
Now you can reorder tiers by dragging and moving them.
Tier order
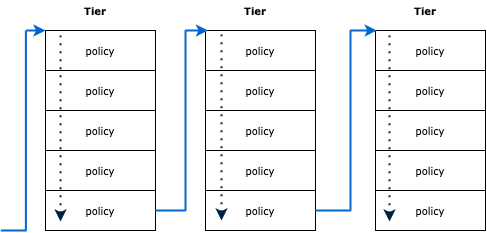
Tiers are sorted by their orders (from left to right), starting from the lowest order (the highest priority) tiers.
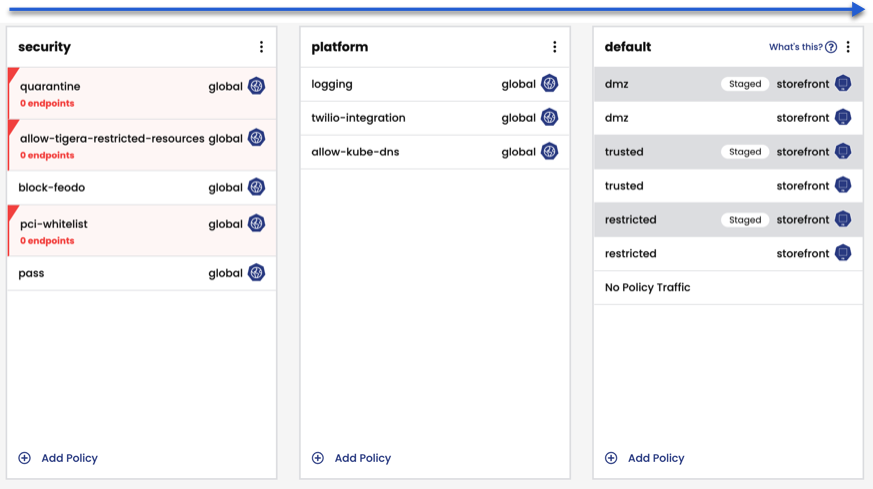
In the example above, tier priorities are as follows:
- security tier - is higher priority than platform tier
- platform tier - is higher priority than default tier
- default tier - is the lowest priority
The tier you put as the highest priority (after system tiers), depends on your environment. In compliance-driven environments, the security tier may be the highest priority (as shown above). There is no one-size-fits-all order.
Policy processing
Policies are processed in sequential order from lowest order (highest priority) to highest order (lowest priority), which is from top to bottom in the following diagram.
Two mechanisms drive how traffic is processed across tiered policies:
- Labels and selectors
- Policy action rules
It is important to understand the roles they play.
Labels and selectors
Instead of IP addresses and IP ranges, network policies in Kubernetes depend on labels and selectors to determine which workloads can talk to each other. Workload identity is the same for Kubernetes and Calico Cloud network policies: as pods dynamically come and go, network policy is enforced based on the labels and selectors that you define.
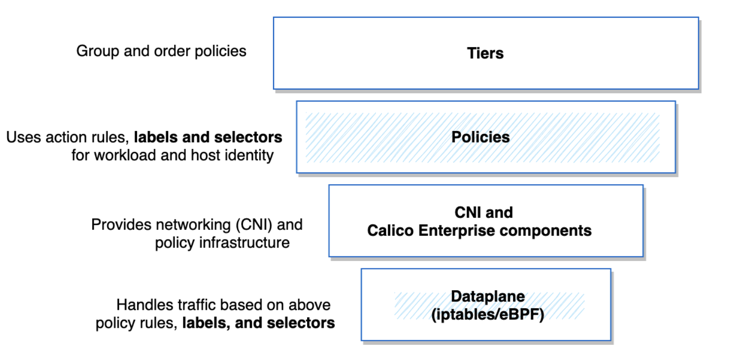
The following diagrams show the relationship between all of the elements that affect traffic flow:
- Tiers group and order policies
- Policy action rules define how to process traffic in and across tiers, and policy labels and selectors specify how groups of pods are allowed to communicate with each other and other network endpoints
- The CNI, Calico Cloud components, and underlying data plane (iptables/eBPF) all make use of labels and selectors as part of routing traffic.
Policy action rules
Calico Cloud network policy uses action rules to specify how to process traffic/packets:
- Allow or Deny - traffic is allowed or denied and the packet is handled accordingly. No further rules are processed.
- Pass - skips to the next tier that contains a policy that applies to the endpoint, and processes the packet. If the tier applies to the endpoint but no action is taken on the packet, the packet is dropped.
- Log - creates a log, and evaluation continues processing to the next rule
Implicit default deny
As shown in the following diagram, at the end of each tier is an implicit default deny. This is a safeguard that helps mitigate against unsecured policy. Because of this safeguard, you must either explicitly update tier's default action to Pass or apply a Pass action rule when you want traffic evaluation to continue. In the following example, the Pass action in a policy ensures that traffic evaluation continues, and overrides the implicit default deny.

Let’s look at a Dev/Ops global network policy in a high precedence tier (Platform). The policy denies ingress and egress traffic to workloads that match selector, env == "stage". To ensure that policies continue to evaluate traffic after this policy, the policy adds a Pass action for both ingress and egress.
Pass action rule example
apiVersion: projectcalico.org/v3
kind: GlobalNetworkPolicy
metadata:
  name: devops.stage-env
spec:
  tier: devops
  order: 255
  selector: env == "stage"
  ingress:
    - action: Deny
      source:
        selector: env != "stage"
    - action: Pass
  egress:
    - action: Deny
      destination:
        selector: env != "stage"
    - action: Pass
  types:
    - Ingress
    - Egress
The other option, is to update tier's default action to Pass to override the implicit default deny.
Pass default action tier example
apiVersion: projectcalico.org/v3
kind: Tier
metadata:
  name: devops
spec:
  order: 300
  defaultAction: Pass
Policy endpoint matching across tiers
Whoever is responsible for tier creation, also needs to understand how policy selects matching endpoints across tiers. For normal policy processing (without apply-on-forward, pre-DNAT, and do-not-track), if no policies within a tier apply to endpoints, the tier is skipped, and the tier's implicit deny behavior is not executed.
In the following example, policy D in the Security tier includes a Pass action rule because we want traffic evaluation to continue to the next tier in sequence. In the Platform tier, there are no selectors in policies that match endpoints so the tier is skipped, including the end of tier deny. Evaluation continues to the Application tier. Policy J is the first policy with a matching endpoint.

Default endpoint behavior
Also, tier managers need to understand the default behavior for endpoints based on whether the endpoint is known or unknown, and the endpoint type. As shown in the following table:
- Known endpoints - Calico Cloud resources that are managed by Felix
- Unknown endpoints - interfaces/resources not recognizable as part of our data model
| Endpoint type | Default behavior for known endpoints | Default behavior for unknown endpoints (outside of our data model) |
|---|---|---|
| Workload, Calico Cloud | Deny | Deny |
| Workload, Kubernetes | Allow ingress from same Kubernetes namespace; allow all egress | Deny |
| Host | Deny. With exception of auto host endpoints, which get default-allow. | Fall through and use iptables rules |
Best practices for tiered policy
To control and authorize access to Calico Cloud tiers, policies, and Kubernetes network policies, you use Kubernetes RBAC. Security teams can prevent unauthorized viewing or modification of higher precedence (lower order) tiers, while still allowing developers or service owners to manage the detailed policies related to their workloads.
We recommend:
-
Limit tier creation permissions to Admin users only; creating and reordering tiers affects your policy processing workflow
-
Limit full CRUD operations on tiers and policy management to select Admin users
-
Review your policy processing whenever you add/reorder tiers
For example, you may need to update Pass action rules to policies before or after the new tier. Intervening tiers may require changes to policies before and after, depending on the endpoints.
-
Use the policy preview feature to see effects of policy in action before enforcing it, and use the staged network policy feature to test the entire tier workflow before pushing it to production
Additional resources
- For details on using RBAC for fine-grained access to tiers and policies, see Configure RBAC for tiered policies.