Create a Calico Enterprise management cluster
Big picture
Create a Calico Enterprise management cluster to manage multiple clusters from a single management plane.
Value
Managing standalone clusters and multiple instances of Elasticsearch is not onerous when you first install Calico Enterprise. But as you move to production with 300+ clusters, it is not scalable; you need centralized cluster management and log storage. With Calico Enterprise multi-cluster management, you can securely connect multiple clusters from different cloud providers in a single management plane, and control user access using RBAC. This architecture also supports federation of network policy resources across clusters, and lays the foundation for a “single pane of glass.”
Before you begin...
Required
- A Calico Enterprise cluster, see here for help
- A reachable, public IP address for the management cluster
How to
Create a management cluster
To control managed clusters from your central management plane, you must ensure it is reachable for connections. The simplest way to get started (but not for production scenarios), is to configure a NodePort service to expose the management cluster. Note that the service must live within the calico-system namespace.
-
Create a service to expose the management cluster. The following example of a NodePort service may not be suitable for production and high availability. For options, see Fine-tune multi-cluster management for production. Apply the following service manifest.
kubectl create -f - <<EOFapiVersion: v1kind: Servicemetadata:name: calico-manager-mcmnamespace: calico-systemspec:ports:- nodePort: 30449port: 9449protocol: TCPtargetPort: 9449selector:k8s-app: calico-managertype: NodePortEOF -
Export the service port number, and the public IP or host of the management cluster. (Ex. "example.com:1234" or "10.0.0.10:1234".)
export MANAGEMENT_CLUSTER_ADDR=<your-management-cluster-addr> -
Apply the ManagementCluster CR.
kubectl apply -f - <<EOFapiVersion: operator.tigera.io/v1kind: ManagementClustermetadata:name: tigera-securespec:address: $MANAGEMENT_CLUSTER_ADDREOF
Create an admin user and verify management cluster connection
To access resources in a managed cluster from the Calico Enterprise web console within the management cluster, the logged-in user must have appropriate permissions defined in that managed cluster (clusterrole bindings).
-
Create an admin user called,
mcm-userin the default namespace with full permissions, by applying the following commands.kubectl create sa mcm-userkubectl create clusterrolebinding mcm-user-admin --serviceaccount=default:mcm-user --clusterrole=tigera-network-admin -
Create a secret for the service account
noteThis step is needed if your Kubernetes cluster is version v1.24 or above. Prior to Kubernetes v1.24, this secret is created automatically.
kubectl apply -f - <<EOFapiVersion: v1kind: Secrettype: kubernetes.io/service-account-tokenmetadata:name: mcm-userannotations:kubernetes.io/service-account.name: "mcm-user"EOF -
For Kubernetes v1.24+, use the following command to obtain the token for the secret associated with your host
kubectl describe secret mcm-userFor Kubernetes clusters prior to version v1.24, use the following command to retrieve your token:
kubectl get secret $(kubectl get serviceaccount mcm-user -o jsonpath='{range .secrets[*]}{.name}{"\n"}{end}' | grep token) -o go-template='{{.data.token | base64decode}}' && echoIn the top right banner, your management cluster is displayed as the first entry in the cluster selection drop-down menu with the fixed name,
management cluster.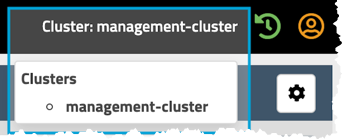
You have successfully installed a management cluster.
Next steps
- To create and add a managed cluster to your management cluster, see Create and configure a managed cluster
- When you are ready to fine-tune your multi-cluster management deployment for production, see Fine-tune multi-cluster management
- To change an existing Calico Enterprise standalone cluster to a management or managed cluster, see Change cluster types